

Are you tired of living in a home that feels outdated or dull? Do you want to breathe new life into your living spaces without breaking the bank? Look no further than Daphne’s Corner, where we’ve curated a collection of simple yet transformative home improvement projects that you can tackle with ease.

In this comprehensive guide, we’ll explore a wide range of DIY projects that can elevate the style and functionality of your home, from quick and easy updates to more involved renovations. Whether you’re a seasoned DIYer or a beginner, you’ll find inspiration and practical advice to help you create the living space of your dreams.
Introduction: Unleash the Power of DIY
Home improvement projects can seem daunting, but with the right guidance and a can-do attitude, you can transform your living spaces without hiring a professional. At Daphne’s Corner, we believe that DIY projects are not only cost-effective but also incredibly rewarding, allowing you to put your personal touch on your home.
In this article, we’ll walk you through a variety of simple yet impactful home improvement ideas that you can tackle with confidence. From quick and easy upgrades to more involved whole-room transformations, we’ll provide step-by-step instructions, practical tips, and inspiring visuals to help you bring your dream home to life.
Quick and Easy Upgrades
Refresh Your Walls with a New Paint Color
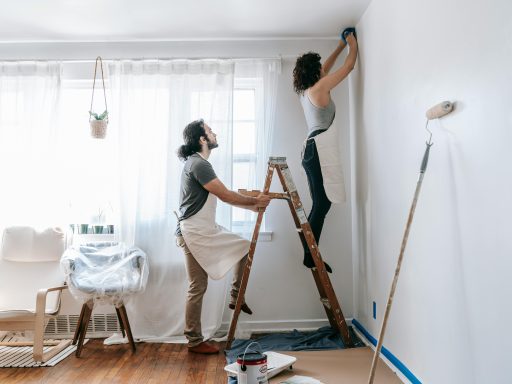
One of the easiest and most dramatic ways to transform a room is with a fresh coat of paint. Whether you opt for a bold accent wall or a soothing neutral hue, a new paint color can instantly breathe new life into your space.
What You’ll Need:
- Paint (choose a high-quality interior paint)
- Paint rollers and brushes
- Painter’s tape (optional)
- Drop cloths or old sheets
Step-by-Step Instructions:
- Prepare the room by removing any wall hangings, furniture, or other decor from the walls.
- Clean the walls thoroughly, removing any dirt, grease, or debris.
- Apply painter’s tape along the edges and around any trim or fixtures, if desired.
- Pour the paint into a paint tray and use a roller to apply the paint in smooth, even strokes.
- Cut in along the edges and corners using a paintbrush.
- Apply a second coat for optimal coverage, allowing the first coat to dry completely between applications.
- Remove the painter’s tape and replace any removed items.
Pro Tip: Consider using a high-quality paint with a satin or eggshell finish for a durable, washable surface.
Add Decorative Touches with DIY Shelves
Incorporating custom shelves into your home is an easy way to add both functionality and style. Whether you opt for floating shelves, built-in bookcases, or freestanding units, DIY shelving projects can be a great weekend warrior task.
What You’ll Need:
- Wooden boards or pre-made shelves
- Brackets or supports
- Drill
- Screws
- Level
- Stain or paint (optional)
Step-by-Step Instructions:
- Measure the desired location and space for your shelves.
- Cut the wooden boards to size, if necessary.
- Attach the brackets or supports to the wall, using a level to ensure they are straight.
- Place the shelves on the supports and secure them in place with screws.
- Stain or paint the shelves, if desired, to match your décor.
- Style your new shelves with decorative items, books, and other personal touches.
Pro Tip: Consider adding LED strip lighting underneath your shelves to create a warm, inviting ambiance.
Revamp Your Entryway with a Stylish Makeover
Your entryway is the first impression guests have of your home, so why not make it a memorable one? With a few simple DIY upgrades, you can transform your entryway into a welcoming and visually appealing space.
What You’ll Need:
- Fresh paint or wallpaper
- New light fixture
- Decorative mirror
- Entryway bench or console table
- Hooks or coat rack
- Decorative accessories (e.g., planters, baskets, artwork)
Step-by-Step Instructions:
- Start by freshening up the walls with a new paint color or wallpaper.
- Install a new light fixture to brighten up the space and create a warm, inviting atmosphere.
- Hang a decorative mirror to visually expand the entryway and reflect light.
- Add a functional yet stylish piece of furniture, such as an entryway bench or console table, to provide storage and seating.
- Install hooks or a coat rack to keep outerwear and accessories organized.
- Finish the space with decorative accessories that reflect your personal style, such as planters, baskets, and artwork.
Pro Tip: Consider adding a rug or runner to the floor to define the space and add a touch of coziness.
Intermediate Home Improvement Projects
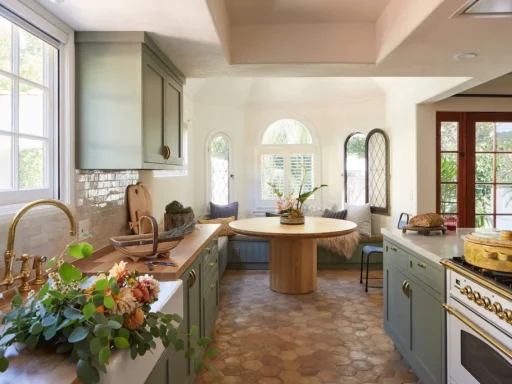
Transform Your Kitchen with a DIY Backsplash
Upgrading your kitchen’s backsplash is a fantastic way to add both visual interest and functionality to the heart of your home. With the right tools and techniques, you can create a custom backsplash that perfectly complements your kitchen’s style.
What You’ll Need:
- Tile (choose from a variety of materials, such as ceramic, glass, or natural stone)
- Tile adhesive
- Grout
- Tile saw or nippers
- Notched trowel
- Sponge
- Grout float
Step-by-Step Instructions:
- Measure the area you want to cover and calculate the number of tiles needed.
- Prepare the wall surface by cleaning it thoroughly and ensuring it’s level.
- Apply the tile adhesive to the wall using a notched trowel.
- Carefully place the tiles, pressing them firmly into the adhesive and leaving the desired grout spacing.
- Allow the adhesive to dry completely, then use a grout float to apply the grout between the tiles.
- Wipe away any excess grout with a damp sponge.
- Seal the grout and enjoy your brand-new, custom backsplash!
Pro Tip: Consider using a contrasting grout color to make the tile pattern pop.
Upgrade Your Bathroom with a Tile Refresh
Tired of outdated or dingy bathroom tiles? A tile refresh can breathe new life into your bathroom, creating a spa-like atmosphere you’ll love.
What You’ll Need:
- Tile (choose from a variety of materials, such as ceramic, porcelain, or natural stone)
- Tile adhesive
- Grout
- Tile saw or nippers
- Notched trowel
- Sponge
- Grout float
Step-by-Step Instructions:
- Carefully remove the existing tiles, taking care not to damage the underlying wall surface.
- Prepare the wall by cleaning it thoroughly and ensuring it’s level and smooth.
- Apply the tile adhesive to the wall using a notched trowel.
- Carefully place the new tiles, pressing them firmly into the adhesive and leaving the desired grout spacing.
- Allow the adhesive to dry completely, then use a grout float to apply the grout between the tiles.
- Wipe away any excess grout with a damp sponge.
- Seal the grout and enjoy your refreshed, modern bathroom!
Pro Tip: Consider adding a decorative border or accent tiles to create a unique, custom look.
Create a Cozy Reading Nook
Transform an unused corner or alcove into a cozy and inviting reading nook, where you can curl up with a good book and escape the stresses of everyday life.
What You’ll Need:
- Comfortable seating (e.g., armchair, loveseat, or window seat)
- Throw pillows and blankets
- Adjustable task lighting
- Bookshelves or floating shelves
- Decorative accessories (e.g., plants, artwork, area rug)
Step-by-Step Instructions:
- Identify a suitable space in your home that can be converted into a reading nook, such as a corner, alcove, or unused window sill.
- Choose comfortable seating that fits the space, such as an armchair, loveseat, or built-in window seat.
- Add throw pillows and a cozy blanket to create a welcoming, inviting atmosphere.
- Install adjustable task lighting, such as a floor lamp or wall-mounted sconce, to provide the perfect reading light.
- Add bookshelves or floating shelves to display your literary collection and personalize the space.
- Finish the nook with decorative accessories that reflect your style, such as plants, artwork, and a plush area rug.
Pro Tip: Consider adding a small side table or ottoman to provide a place to set down your book and a cup of tea.
Whole-Room Transformations
Reinvent Your Living Room with a DIY Accent Wall
An accent wall is a fantastic way to add depth, texture, and visual interest to your living room. Whether you choose to create a bold, statement-making feature wall or a more subtle, textured backdrop, this DIY project can have a big impact.
What You’ll Need:
- Accent wall material (e.g., shiplap, peel-and-stick wallpaper, or wood paneling)
- Adhesive or mounting hardware
- Measuring tape
- Level
- Saw or utility knife
- Caulk and caulk gun (if needed)
Step-by-Step Instructions:
- Decide on the accent wall material and measure the area you want to cover.
- Cut the material to size, if necessary, using a saw or utility knife.
- Apply the adhesive or mounting hardware to the wall, following the manufacturer’s instructions.
- Carefully position and attach the accent wall material, ensuring it’s level and straight.
- Use caulk to fill any gaps or seams, if needed.
- Step back and admire your stunning new accent wall!
Pro Tip: Consider incorporating a mix of textures, such as shiplap and reclaimed wood, to add depth and visual interest to your accent wall.
Maximize Storage with a Custom Closet Organizer
If your closet is always in a state of disarray, a custom closet organizer system can be a game-changer. By creating a tailored storage solution, you can maximize space, keep your belongings neatly organized, and streamline your daily routine.
What You’ll Need:
- Closet organizer components (e.g., shelves, drawers, rods, baskets)
- Drill
- Screws
- Level
- Measuring tape
Step-by-Step Instructions:
- Measure your closet space and create a plan for the layout and components you’d like to include.
- Install the necessary support structures, such as shelving brackets or hanging rods, using the drill and screws.
- Assemble and install the closet organizer components, ensuring they are level and securely in place.
- Arrange your belongings in a way that maximizes the available space and makes items easily accessible.
- Add finishing touches, such as decorative baskets or labels, to create a cohesive, organized look.
Pro Tip: Consider incorporating adjustable shelves and rods to accommodate changes in your wardrobe and storage needs over time.
Elevate Your Outdoor Space with a DIY Patio Makeover
Transform your outdoor living area into a beautiful and functional extension of your home with a DIY patio makeover. From laying a new paving surface to adding cozy seating and lush greenery, this project can create a welcoming, resort-like atmosphere right in your own backyard.
What You’ll Need:
- Paving materials (e.g., pavers, concrete, or natural stone)
- Outdoor furniture (e.g., patio set, lounge chairs, benches)
- Patio decor (e.g., planters, string lights, umbrellas)
- Landscaping materials (e.g., plants, mulch, edging)
- Tools (e.g., wheelbarrow, shovel, level)
Step-by-Step Instructions:
- Prepare the patio area by clearing any existing vegetation or debris.
- Lay the new paving surface, ensuring proper grading and drainage.
- Set up the outdoor furniture, arranging it in a comfortable and visually appealing layout.
- Incorporate patio decor, such as planters, string lights, and umbrellas, to create a cozy and inviting atmosphere.
- Landscape the surrounding area with plants, mulch, and edging to enhance the overall aesthetic.
- Step back and enjoy your brand-new, outdoor oasis!
Pro Tip: Consider adding a fire pit or outdoor kitchen to turn your patio into a true gathering space for family and friends.
Comparison Tables
Quick and Easy Upgrades Comparison
| Project | Time Required | Cost | Difficulty |
|---|---|---|---|
| Refresh Your Walls with a New Paint Color | 1-2 days | $50-$200 | Beginner |
| Add Decorative Touches with DIY Shelves | 2-4 hours | $50-$200 | Intermediate |
| Revamp Your Entryway with a Stylish Makeover | 1-2 days | $200-$500 | Intermediate |
Intermediate Home Improvement Projects Comparison
| Project | Time Required | Cost | Difficulty |
|---|---|---|---|
| Transform Your Kitchen with a DIY Backsplash | 2-4 days | $200-$500 | Intermediate |
| Upgrade Your Bathroom with a Tile Refresh | 3-5 days | $500-$1,000 | Intermediate |
| Create a Cozy Reading Nook | 1-2 days | $200-$500 | Intermediate |
FAQs
Q: How much does it typically cost to complete these home improvement projects?
A: The cost of each project can vary depending on the scope of the project, the materials used, and your location. However, we’ve provided a general cost range for each project in the comparison tables. Keep in mind that you may be able to save money by doing the work yourself, rather than hiring a professional.
Q: Do I need any special tools or equipment to complete these DIY projects?
A: The required tools and equipment will depend on the specific project, but we’ve included a list of the essential items needed for each one. Some projects may require more specialized tools, such as a tile saw or power tools, but we’ve tried to focus on projects that can be completed with basic DIY tools that most homeowners already have.
Q: How much time should I allot for these home improvement projects?
A: The time required for each project can vary based on factors like your skill level, the complexity of the project, and any unforeseen issues that may arise. However, we’ve provided a general time estimate for each project in the comparison tables.
For the quick and easy upgrades, you can expect to spend about 1-2 days on refreshing your walls with a new paint color, 2-4 hours on adding decorative DIY shelves, and 1-2 days on revamping your entryway. These projects are relatively straightforward and can often be completed over a weekend.
The intermediate home improvement projects will require a bit more time investment. Transforming your kitchen with a DIY backsplash can take 2-4 days, upgrading your bathroom with a tile refresh can take 3-5 days, and creating a cozy reading nook can be done in 1-2 days. These projects involve more detailed work, such as tile installation or furniture assembly, so you’ll want to plan accordingly.
When it comes to the whole-room transformations, the time commitment can vary even more. Reinventing your living room with a DIY accent wall may take 1-2 days, depending on the complexity of the accent material. Maximizing storage with a custom closet organizer can be a more involved project, potentially taking 2-4 days to complete, as it requires careful planning and installation. Finally, elevating your outdoor space with a DIY patio makeover can be one of the more time-consuming projects, often taking 3-5 days to lay the new paving surface, set up the outdoor furniture, and landscape the surrounding area.
It’s important to note that these time estimates are just general guidelines, and your actual project timelines may vary. Factors such as your experience level, the size and scope of the project, and any unexpected challenges that may arise can all impact the overall duration. We always recommend building in a buffer of extra time to account for any unforeseen circumstances.
Additionally, it’s worth considering whether you’ll be tackling the project solo or enlisting the help of friends or family members. Collaborating with others can often speed up the process, as you can divide the tasks and work more efficiently. However, if you’re a beginner DIYer, you may want to start with smaller, more manageable projects to gain confidence and experience before taking on larger, more time-consuming renovations.
Regardless of the project, it’s crucial to set realistic expectations and plan accordingly. By allocating sufficient time for each step of the process, you’ll be able to complete your home improvement projects with confidence and minimize any unnecessary stress or rushing.
Remember, the joy of DIY is in the journey. Embrace the process, learn new skills, and don’t be afraid to take your time to ensure a high-quality, long-lasting result. With a little patience and the right approach, you can transform your living spaces and create a home that truly reflects your personal style and needs.
Unleash Your DIY Potential: Tackling Home Improvement Projects with Confidence
At Daphne’s Corner, we believe that home improvement projects shouldn’t be daunting, but rather an opportunity to unleash your creativity and transform your living spaces. Whether you’re a seasoned DIYer or a beginner, the projects we’ve outlined in this guide offer something for everyone.
From quick and easy upgrades that can instantly refresh a room, to more involved whole-room transformations, each project is designed to be accessible and rewarding. By breaking down the steps, providing clear instructions, and offering practical tips, we aim to empower you to tackle these projects with confidence.
One of the key benefits of DIY home improvement is the sense of accomplishment and pride that comes with completing a project yourself. Not only will you save money by avoiding costly professional services, but you’ll also have the satisfaction of putting your own personal touch on your living spaces. Plus, with the right guidance and a bit of practice, you’ll be able to tackle increasingly complex projects and become a true DIY expert.
Remember, Rome wasn’t built in a day, and neither are dream homes. Take your time, enjoy the process, and don’t be afraid to experiment and try new techniques. With a little patience and the right mindset, you can transform your living spaces and create a home that truly reflects your style and personality.
So, what are you waiting for? Grab your tools, roll up your sleeves, and let’s get started on your next home improvement adventure!

Hi there, just became alert to your blog through Google, and found that it is
truly informative. I’m gonna watch out for brussels.
I’ll be grateful if you continue this in future.
Lots of people will be benefited from your writing.
Cheers!