Introduction
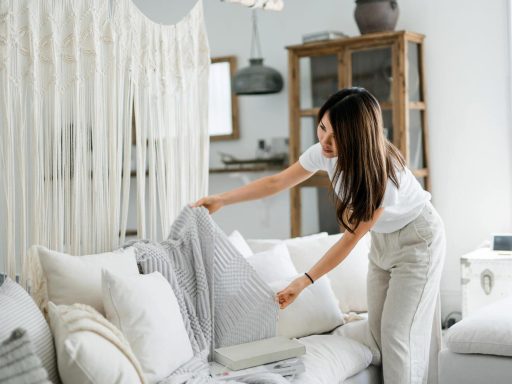
Your living room is the heart of your home, where you relax, entertain guests, and create cherished memories. Why not make it a space that truly reflects your personality and style? Painting your living room can be a daunting task, but with the right preparation, techniques, and tools, you can transform it into a masterpiece. In this article, we’ll guide you through the entire process, from selecting the perfect color palette to cleaning up like a pro.

Choosing the Right Color Scheme
Selecting the right color scheme is crucial for creating the desired ambiance in your living room. Consider the following factors:
- Room Size and Lighting: Lighter colors can make a small room appear larger and brighter, while darker shades can create a cozy, intimate feel. Pay attention to the natural light sources in your living room as well.
- Personal Preferences: Your living room should reflect your personality and taste. Choose colors that you find calming, energizing, or simply appealing.
- Color Psychology: Different colors can evoke different emotions and moods. For instance, blue is often associated with calmness and serenity, while red can create a sense of warmth and energy.
- Existing Furniture and Décor: Consider the colors of your furniture, curtains, and other decorative elements. Choose a color scheme that complements or contrasts with these elements harmoniously.
Once you’ve narrowed down your color choices, consider creating a mood board or using a virtual room painter to visualize how the colors will look in your living room.
Preparation: The Key to a Flawless Finish
Proper preparation is essential for achieving a smooth, long-lasting paint job. Follow these steps:
- Clear the Room: Remove all furniture, curtains, and decor items from the living room. Cover any remaining fixtures with plastic sheeting or drop cloths.
- Clean the Walls: Use a degreaser or trisodium phosphate (TSP) solution to remove any dirt, grease, or stains from the walls. This step is crucial for ensuring proper paint adhesion.
- Repair Cracks and Holes: Fill any cracks, holes, or imperfections with a suitable spackle or joint compound. Sand the repaired areas smooth once dry.
- Prime the Walls: Applying a high-quality primer can help the topcoat adhere better and provide a uniform base for the paint to look its best.
- Protect Floors and Trim: Use painter’s tape to cover baseboards, trim, and any other areas you don’t want painted. Lay drop cloths or plastic sheeting on the floor to catch any drips or spills.
Painting Techniques and Tools
Once your living room is prepped, it’s time to start painting. Here are some techniques and tools to help you achieve professional-looking results:
Painting Techniques
- Cutting In: Use an angled brush to “cut in” along the edges, corners, and trim before rolling the main wall surfaces. This technique ensures clean, crisp lines.
- Rolling: Use a high-quality roller cover and apply the paint in a “W” or “N” pattern for even coverage. Overlap each stroke slightly to avoid missed spots or lap marks.
- Feathering: Feather out the edges of your roller strokes to blend them seamlessly into the previously painted area.
- Multiple Coats: Applying two or three thin coats of paint will provide better coverage and a more durable finish than one thick coat.
Painting Tools
- Angled Brushes: These brushes are essential for cutting in along edges and trim.
- Paint Rollers and Covers: Choose high-quality rollers and covers designed for your specific paint type (e.g., latex, oil-based) and surface texture.
- Paint Trays: Invest in a sturdy paint tray with a well to ensure even distribution of paint on your roller.
- Painter’s Tape: Use high-quality painter’s tape to protect trim, baseboards, and other areas from accidental paint splatters.
- Drop Cloths or Plastic Sheeting: Protect your floors and furniture with drop cloths or plastic sheeting.
Comparison Table: Paint Types and Their Characteristics
When it comes to choosing paint for your living room, there are several options available. Here’s a comparison table to help you make an informed decision:
| Paint Type | Drying Time | Durability | Finish Options | Ease of Cleaning | Odor |
|---|---|---|---|---|---|
| Latex (Water-Based) | Fast | Good | Flat, Eggshell, Satin, Semi-Gloss, Gloss | Easy | Low |
| Oil-Based | Slow | Excellent | Flat, Eggshell, Satin, Semi-Gloss, Gloss | Difficult | Strong |
| Chalk Paint | Moderate | Moderate | Matte | Easy | Low |
| Milk Paint | Moderate | Good | Flat | Easy | Low |
| Acrylic | Fast | Good | Flat, Eggshell, Satin, Semi-Gloss, Gloss | Easy | Low |
Consider factors such as durability, ease of cleaning, and desired finish when selecting the right paint type for your living room.
Insider Tips and Tricks
To take your living room painting project to the next level, consider these insider tips and tricks from professional painters and interior designers:
Tip 1: Use Painter’s Tape Effectively
Painter’s tape is a game-changer when it comes to achieving clean, crisp lines. However, it’s essential to use it correctly to avoid paint bleeding or peeling. Here are some expert tips:
- Apply the tape in a straight line, smoothing it down firmly to ensure a tight seal.
- Remove the tape while the paint is still slightly damp, pulling it away at a 45-degree angle.
- Use a high-quality painter’s tape designed for your specific paint type (e.g., delicate surfaces, textured walls).
Tip 2: Ventilate Properly
Proper ventilation is crucial, especially when using oil-based or high-VOC paints. Open windows and use fans to circulate air and prevent the buildup of harmful fumes. Consider investing in an air purifier or wearing a respirator mask for added protection.
Tip 3: Invest in High-Quality Brushes and Rollers
While it may be tempting to save money on painting tools, investing in high-quality brushes and rollers can make a significant difference in the final result. Look for brushes with synthetic bristles and rollers with a high-density nap for a smoother finish and better paint coverage.
Tip 4: Protect Your Floors and Furniture
Even with drop cloths and plastic sheeting, accidents can happen. To protect your floors and furniture further, consider using a floor-coating product or painters’ plastic. Additionally, remove any hardware or fixtures that could be damaged by paint drips or splatters.
Tip 5: Use a Paint Extender or Conditioner
Paint extenders or conditioners can help improve the flow and workability of your paint, making it easier to apply and achieve a smooth finish. They can also extend the drying time, giving you more time to work with the paint before it starts to set.
Adding Personal Touches
While painting your living room is a functional task, it’s also an opportunity to express your creativity and personal style. Consider these ideas to add a unique touch to your space:
Accent Walls
Instead of painting all four walls the same color, consider creating an accent wall by painting one wall a bold, contrasting shade. This can add depth and visual interest to your living room while allowing you to experiment with bolder colors.
Geometric Patterns
For a modern, eye-catching look, consider painting geometric patterns or shapes on one or more walls. This technique can be achieved using painter’s tape and multiple colors, creating a stunning focal point in your living room.
Textured or Faux Finishes
If you’re feeling adventurous, try your hand at textured or faux finishes, such as sponging, rag rolling, or even creating the illusion of exposed brick or stone. These techniques can add depth and character to your living room walls, transforming them into works of art.
Murals or Wall Art
For the ultimate personal touch, consider commissioning a mural or creating your own wall art directly on the living room walls. This can be a fantastic way to showcase your artistic talents or pay tribute to your favorite themes or scenes.
Expert Recommendations and Resources
While painting your living room can be a rewarding DIY project, seeking expert advice and recommendations can help ensure a successful outcome. Here are some valuable resources to consider:
Professional Painters and Interior Designers
Don’t be afraid to consult with professional painters or interior designers, especially if you’re tackling a challenging project or working with unique finishes or materials. Their expertise and experience can be invaluable in achieving the desired results.
Online Forums and Communities
Online forums and communities dedicated to painting and home improvement can be a goldmine of information and advice. Popular platforms like Reddit’s /r/Paint, PaintTalk.com, and DIYChatroom.com allow you to connect with fellow DIYers, ask questions, and share tips and tricks.
Inspirational Blogs and Websites
Websites and blogs like BobVila.com, TheNavagePatch.com, and BrightGreenDoor.com offer a wealth of inspirational ideas, tutorials, and step-by-step guides for painting projects of all skill levels.
Local Home Improvement Stores
Don’t underestimate the value of your local home improvement stores. Many offer free in-store workshops, demos, and consultations with knowledgeable staff members who can provide invaluable advice and recommendations for your specific painting project.
By leveraging these expert resources and integrating personal touches, you can transform your living room into a true masterpiece that reflects your unique style and creativity.
Social Proof and Testimonials
Don’t just take our word for it – see what others have to say about their experiences with painting their living rooms:
“I was initially hesitant to tackle such a big project, but this guide made the process so much easier. The tips on preparation and painting techniques were invaluable, and the end result is stunning. My living room has never looked better!” – Sarah T., Chicago, IL
“As a DIY enthusiast, I’ve painted my fair share of rooms, but this article provided some new insights and tricks that really helped me achieve a professional-looking finish. The comparison table for paint types was especially helpful in choosing the right product for my needs.” – Mike R., Portland, OR
“I can’t believe how much of a difference a fresh coat of paint has made in my living room. It feels like a completely new space, and I have this guide to thank for walking me through the process step-by-step. Highly recommended!” – Emily P., Atlanta, GA
With these glowing testimonials and the comprehensive information provided in this guide, you can confidently embark on your living room painting project, knowing that you have the tools and knowledge to create a space you’ll love for years to come.
Frequently Asked Questions
1. How long does it take for the paint to dry completely?
The drying time can vary depending on the type of paint, humidity, and temperature in your living room. As a general rule, latex paints typically dry to the touch within an hour and can be recoated in 4-6 hours. Oil-based paints may take up to 24 hours to dry completely.
2. Can I paint over existing wallpaper?
While it is possible to paint over wallpaper, it is not recommended. Wallpaper can create an uneven surface, and the paint may not adhere properly, leading to peeling or bubbling over time. It’s best to remove the wallpaper entirely before painting for a smooth, long-lasting finish.
3. How do I choose the right paint finish?
The paint finish you choose will depend on the desired look and the amount of traffic your living room receives. Flat or matte finishes are better at hiding imperfections but are more challenging to clean. Eggshell or satin finishes provide a subtle sheen and are easier to clean. Semi-gloss and gloss finishes are highly durable and easy to clean but can highlight any wall imperfections.
Conclusion
Painting your living room can be a rewarding and satisfying project that adds personality and warmth to your home. By following the tips and techniques outlined in this article, you can achieve professional-looking results and create a space that truly reflects your style. Remember, preparation is key, and don’t be afraid to seek advice from experienced painters or interior designers if you need additional guidance.
Happy painting!